Здравствуйте. В этой статье я покажу как создать простой циферблат для часов под управлением Android Wear.
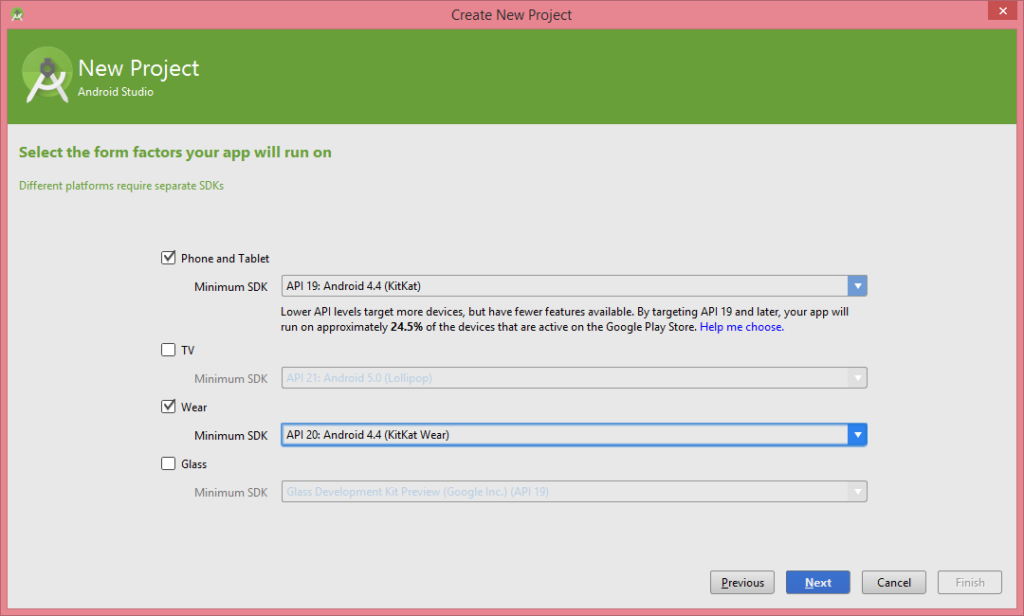
Шаг 1: Создайте новый проект в AndroidStudio.
Шаг 2: Выберите минимальную версию API для телефонов и часов.

Шаг 3: eОткройте ваш AndroidManifest.xml, располагающийся в wear/src/main and и замените на код, расположенный ниже:
<?xml version="1.0" encoding="utf-8"?>
<manifest xmlns:android="http://schemas.android.com/apk/res/android"
    package="com.example.myandroidwear">

    <uses-feature android:name="android.hardware.type.watch">

    <application
        android:allowBackup="true"
        android:icon="@drawable/ic_launcher"
        android:label="@string/app_name"
        android:theme="@android:style/Theme.DeviceDefault">
        <activity
            android:name=".MainActivity"
            android:allowEmbedded="true"
            android:label="@string/app_name">
            <meta-data android:name="com.google.android.clockwork.home.preview" android:resource="@drawable/ic_launcher">
            <intent-filter>
                <action android:name="android.intent.action.MAIN">
                <category android:name="com.google.android.clockwork.home.category.HOME_BACKGROUND">
            </intent-filter>
        </activity>
    </application>

</manifest>
Шаг 4: Мы будем показывать время на наших часах, поэтому создайте файл time.xml:
<?xml version="1.0" encoding="utf-8"?>
<RelativeLayout xmlns:android="http://schemas.android.com/apk/res/android"
    android:orientation="vertical" android:layout_width="match_parent"
    android:layout_height="match_parent">

    <TextView
        android:id="@+id/watch_time"
        android:textSize="30sp"
        android:layout_centerHorizontal="true"
        android:layout_centerVertical="true"
        android:textColor="#FF0000"
        android:layout_width="wrap_content"
        android:layout_height="wrap_content"
        android:text="8:20pm">
</RelativeLayout>
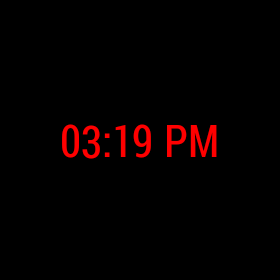
Мы будем использовать это для показа времени. Для того, чтобы посмотреть как это будет выглядеть в конце, перейдите в режим предварительного просмотра.
Шаг 5: В файлах макета round_ и rect_ замените код на этот:
<include layout="@layout/time">
Шаг 6: Вставьте это в ваш MainActivity.java:
package com.example.myandroidwear;

import android.app.Activity;
import android.content.BroadcastReceiver;
import android.content.Context;
import android.content.Intent;
import android.content.IntentFilter;
import android.os.Bundle;
import android.support.wearable.view.WatchViewStub;
import android.widget.TextView;

import java.text.SimpleDateFormat;
import java.util.Calendar;

public class MainActivity extends Activity {

    private TextView mTextView;
    private TextView mTime;
    @Override
    protected void onCreate(Bundle savedInstanceState) {
        super.onCreate(savedInstanceState);
        setContentView(R.layout.activity_main);
        final WatchViewStub stub = (WatchViewStub) findViewById(R.id.watch_view_stub);
        mTime = (TextView) stub.findViewById(R.id.watch_time);
        mBattery = (TextView) stub.findViewById(R.id.watch_battery);
        stub.setOnLayoutInflatedListener(new WatchViewStub.OnLayoutInflatedListener() {
            @Override
            public void onLayoutInflated(WatchViewStub stub) {
                mTextView = (TextView) stub.findViewById(R.id.text);
                mTimeInfoReceiver.onReceive(MainActivity.this, registerReceiver(null, INTENT_FILTER));
                registerReceiver(mTimeInfoReceiver, INTENT_FILTER);
            }
        });
    }

    private final static IntentFilter INTENT_FILTER;
    static {
        INTENT_FILTER = new IntentFilter();
        INTENT_FILTER.addAction(Intent.ACTION_TIME_TICK);
        INTENT_FILTER.addAction(Intent.ACTION_TIMEZONE_CHANGED);
        INTENT_FILTER.addAction(Intent.ACTION_TIME_CHANGED);
    }

    private final String TIME_FORMAT_DISPLAYED = "kk:mm a";

    private BroadcastReceiver mTimeInfoReceiver = new BroadcastReceiver(){
        @Override
        public void onReceive(Context arg0, Intent intent) {
            mTime.setText(
                    new SimpleDateFormat(TIME_FORMAT_DISPLAYED)
                            .format(Calendar.getInstance().getTime()));
        }
    };

    @Override
    protected void onDestroy() {
        super.onDestroy();
        unregisterReceiver(mTimeInfoReceiver);
    }
}
Результат:

